6 Things to Decorate Your Dorm (and 6 Things to Leave Behind)

Decorating a dorm can be challenging because while you want to make it cute, you also want to be reasonable in how much you buy/pack. Keep reading to see my list of 6 things you must take to decorate your dorm, and 6 things you should leave behind.

6 Things to Decorate Your Dorm

1. Pictures/picture frames
It is so comforting to have pictures of loved ones from back home in your college dorm. It is even better when those pictures are in unbelievably cute frames!
2. Wall quotes
There are so many encouraging quotes on canvas or in frames that you can pick up at the store. Or, you can make it an afternoon craft to display your favorite Bible verse for your room… either way, this can serve as cute decor and as a pick-me-up as well!
3. Curtains
Curtains are a nice way to dress up the windows in your dorm that most likely resemble a jail cell window. And for those random mornings where you may get to sleep in, they serve a very necessary function of blocking the sun out so you can snooze way longer than you probably should!
4. Storage ottoman
Whether you need a step stool or a place to rest your feet, having a small storage ottoman is the perfect fit. When moving into a college dorm, anything is worth the money if it’s cute and provides storage. I used my storage ottoman for my dishes, and it was perfect!
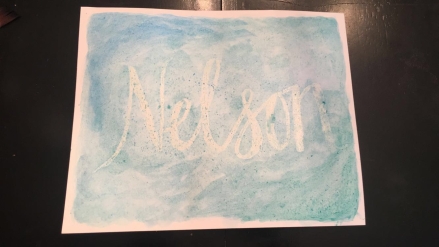
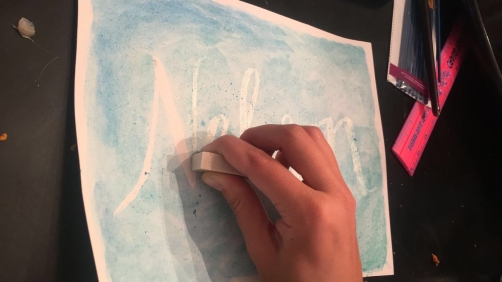
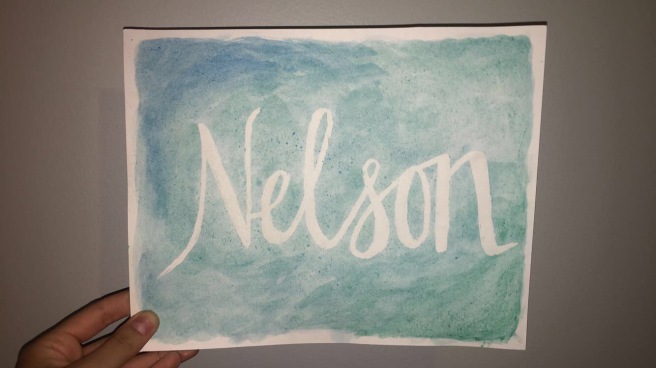
5. At least one initial
I really don’t know what it is about our initials, but decorating with letters is so fun! If you’re not gifted one as a graduation gift, make sure to purchase your first initial to hang on the wall. What better way to personalize your space?
6. Cute desk supplies
Okay so here is a true story: while dorm shopping with my mom a couple years ago, we were faced with a major dilemma. There was a plain black stapler for $7 or a metallic gold one for $22. Logically, I went for the black stapler, but my mother stopped me. She told me that if I promised to keep the gold stapler on display on my desk, she would buy it for me. I agreed, and my desk has never been more stylish.


6 Things to Leave Behind

1. Headboard
Okay, so I don’t know what it is, but sometimes Pinterest is way too much, and this whole being-headboard-to-college-for-your-twin-bed things is definitely unnecessary. I cannot picture a headboard like that functioning properly and quite honestly, it seems like too much of a hassle.
2. Desk chair
If your school provides you with a desk chair, you do not need to bring a different one. Yes, I know, the chair they give you could be SO ugly. But, quite often, the school will make you keep all furniture in your room, so bringing a second chair would just take up more room than needed. Also, remember, whatever you bring to school also has to go home nine months later.
3. An excessive amount of throw pillows
Throw pillows are addicting, I get it. However, I have seen so many girls cover their small college beds in pillows. I can guess, though, that those same girls don’t make their beds regularly. So what does that mean? Throw pillows become literally thrown all over the floor. I don’t think it’s worth the trouble.
4. Anything valuable
If someone made you something of high value, or you have that one adorable vintage piece from your grandma, leave it behind. The risk of transporting it from your house, to the car, to your dorm, and then just to reverse that moving process months later, it is too risky. Not to mention the chaos that can ensue in a college dorm. If your heart would break if you lost it, leave it tucked away back home.
5. Tapestry
I personally have never been a fan of tapestries. The challenge with tapestries is that they are large sheets of color, and dorm rooms are often very small. To spread something that large across the wall, would only cramp up the room. Keep the wall decor simple, to be sure not to minimize your space.
6. Books you won’t read
I LOVE the look of books on a bookshelf. It was so painful for me to leave my pretty looking books on my shelf back home. However, the fact of the matter is the main books you will most likely be reading at school are your textbooks. I would suggest picking just a couple of your favorites or the next book on your list, and leave the rest at home.

Well there you have it! Packing for college can be extremely overwhelming. It is hard to decide which parts of your life get to come with you to your new life, and what you should leave behind, especially when you need to buy new things as well. Just stay calm, and know that whatever you take, if you forget something, you can always get it next time you’re home!

Happy designing!

Why I love interior design… and you should too!

I cannot remember the point in my life in which I fell in love with interior design, but I do know I was young.

The colors of a room have been something I cared about for as long as I can remember.  As an early middle school student, I would secretly re-arrange the furniture layout of my room without even telling my parents.

As a senior in high school, I found myself growing tired of my bright pink walls, so I took it upon myself to pick out a more mature pale grey color, replaced my bed comforter and throw pillows, and in less than 24 hours I had a completely different room.

Interior design is something I have always cared about.  I love it because it helps me relax.  As odd as it may sound, I sleep better in a neat room that is designed to my liking.  Maybe that’s an unhealthy problem, I’m not sure.

Designing a new room gives me a rush of excitement.  In all honesty, serious change freaks me out in some ways.  But I do not consider a new room design as “serious change.”

Instead, it is exciting change.  It is something new and out of the normal.  It is a way to take a space in which we spend a good portion of our life, and tweak it to fit who we are.

There are so many things in this world that we cannot change, but just like that, we can change the look of our home.  That is so exciting to me, because it seems like we are always turning around to find a new interior design trend.  It’s time we take advantage of the ways in which we can express our creativity, the ways that we can make our environment a little bit more pleasant, and the ways in which we seek to bring happiness into our lives.

So go ahead, change it up.  Life is too short to keep your home the same.

Happy designing!


Photo Credit: Polygon Limited Realty

My Favorite Home Décor Stores

Do you ever scroll through the internet and wonder where the heck these people get their home décor?

Home décor can be a tricky thing, because if you’re like me, your price range really narrows down your options.

I have compiled a list of some of my favorite, reasonably priced stores to buy home décor.

Target

I am going to start off quite obvious and unoriginal, yet it just wouldn’t seem right to not include Target on this master list.

Target is very quick to stay up-to-date with the trends, and quite often, their collections will coordinate, so you can buy multiple items and they can easily complete the same room.

Bargain Hunt

Bargain Hunt is one of the home décor stores best kept secrets.  I like to describe it as a Goodwill for brand new items.

Be warned, when you first go in the store, you must be ready to hunt through what can sometimes be a mess.

The good thing is, 90% of the items in this store (home décor and everything else) is overstock from Target.

The pricing at this store is based off of how long the item has been in the store.  Be sure to check the date it arrived and depending on how long ago that was, you may be able to get an additional off of an already extremely discounted price.

Marshall’s/TJMaxx/Home Goods

I had to list these stores as one and the same, basically because you will often see similar items at each (this is because they are all owned by the same company!)

I think the items you can find at these stores are super consistent.

This is where I will go if I need a new picture frame, rug, or basket.  They are always replenishing their stock of home décor, so if you are not crazy about the curtain options this week, go back next Tuesday, and I am sure you will find something new.

At Home

A store like At Home requires time to sift through everything.

At Home is a warehouse-type set-up with aisles and aisles of endless décor.

I would suggest going to a store like this when you are in process of a certain project or decorating a new home.  Because there are so many options, you have to give yourself time to stroll through the mountain of throw pillows.

However, because of all the options, if the timing is right, I guarantee you will find something that will fit.

Don’t let shopping for décor be an intimidating feat.  With patience and the right store, you can have a redesigned space without breaking the bank.  All you need is a little patience and the knowledge of where to start.

Happy designing!

DIY Easy Watercolor Art

Watercolor is one of the easiest forms of paint to catch onto.  It is easily something that can be built up, and if you paint it on too dark, you can always water it down after.

This craft is for those of you that are short on time, but are eager to create some simple DIY décor for your home.  Total, this craft should take you about an hour and a half.

Here is what you will need:

Watercolor Paper

Rubber cement

Watercolor paint

A small paint brush for detail work

A wider paint brush for watercolor

Water

Vinyl eraser

Step 1:

First, you need to decide what design you are going to do.  For me, I prefer to free-hand it.  Take your small paint brush and brush on the rubber cement in the design that you would like.  Be sure to take your time and brush the rubber cement on thick to be sure no paint bleeds through.

Step 2:

Once your design is complete, let the rubber cement dry.  It should not take too long.  The rubber cement will feel tacky once it is dry, but you are good to move on to the next step, anyway.

Step 3:

Once you have decided on your colors (I recommended no more than 2 to keep it from looking too arts-and-crafty), get your cup of water and water down your colors.  It is best to have a plastic tray or plate that you tap out the color onto so you can use the most watered-down color.  Remember, you can always make a color darker, so start with it more watery than you think you would like, and darken it as you go.

blog1.jpg

Step 4:

Let the watercolor dry.  Again, this should not take long, but I like to give it at least 30 minutes.

Step 5:

Once the watercolor has dried, take your vinyl eraser and rub it across the rubber cement.  You will notice the rubber cement picking up, and beneath will be your crisp white design.  Be thorough in removing the cement, and by the time you are done, you will have a new handmade piece for your home!

blog2

blog3Happy designing!

Does interior design even matter?

“But do you really need that?”

How many times are we asked this question?  Whatever it may be pertaining to, the world always seems to be demanding a useful reason as to why you might possibly need to make that purchase you are considering.

Or, quite possibly, you are the one asking yourself that question.  Maybe you have that overtly logical inner voice that is always demanding a strong argument for your shopping.

Don’t get me wrong.  It is so important that we all have that voice.  If you don’t have one, develop one.

However, when it comes to interior design, it can sometimes be difficult to justify a new design piece for your home.  Interior design can be a challenge because let’s be honest, outside of furniture, much of it serves no utilitarian purpose.

This article is for the one whose inner voice always tells them to put it back on the shelf.  Keep reading for some reasons as to why interior design is worth the trouble.

The design of your home can change your mood

You know that peaceful sleep you get when your home is clean?  Similar to that, having a home that is designed according to your taste can very easily lift your spirits.

For me, when I rearrange a room, the fresh new feeling of change helps renew my mind as well.  Making my home look the way I want it to makes me feel more positive to start my day and relaxed when I come back to it.

It creates a space to gather

Have you ever been invited to somebody’s house, only to suggest that instead you switch to your place?  Yes.  Me too.

It is completely reasonable to want to spend time in an environment that is welcoming.  When your home is well-designed, it creates an atmosphere where others can feel relaxed.  This means better memories, and we all want those.

It’s a positive reflection on you and your family

A well-designed home reflects happiness.  A happy home often means a happy family.

When others step through the door into your home, a space that is neat, well-planned and organized communicates to them a sense of happiness.  A disorganized, mix-matched home sends a message of a chaotic life.

Personally, I want to be thought of as a happy person, and if my home can help represent that, then I am all for it.

So with all of that being said, do not be afraid to add a decorative pillow to your couch.  Yes, it may not serve an obvious purpose, but that does not make it useless.  Home décor matters.

Happy designing!


Photo Credit: Townewalk Homes- Living Room


How to use Washi Tape to decorate your dorm (or any room really!)

Going off to college can be an exciting time for anyone.  If you are anything like me, much of that excitement stems from the desire to decorate your dorm room.

Obviously, college is an expensive venture in and of itself.  However, making a dorm room feel like home does not have to put a dent in our wallet.

Washi tape is something I discovered in the last few years.  It doesn’t cost much, but the possibilities are endless when it comes to ways it can be used to add color to your dorm.

Washi tape can be found for a few dollars at any store that carries craft supplies.  The unique thing about this tape is that it comes in a variety of colors and patterns.

In my Freshman dorm, I purchased a few different rolls of Washi tape.  I used it to add colors and stripes to the cinder block walls as well as to frame some pictures I had hung up.

I kept a few rolls in my desk drawer so that I could easily add them anywhere that was beginning to feel plain.  In fact, I remember there was an empty space just above my TV, so my roommate and I used washi tape to put our initials “M + L” on the wall.  It took about ten minutes total, but it was so cute we kept it up all year long!

The convenient thing about Washi tape is it can stick to almost anything, but won’t leave a residue when it comes time to move out.

Check out these Washi tape ideas:

http://www.brit.co/washi-tape-decorations/?utm_campaign=pinbutton_hover

https://www.bloglovin.com/blogs/smile-wave-2621842/sebastians-room-makeover-4842031804

http://blog.blinds.com/diy-washi-tape-windows/

https://diyprojects.com/creative-ways-use-washi-tape/?sf=djwxvez

http://www.decoratingyoursmallspace.com/washi-tape-diy-projects/


Happy designing!


Photo credit: http://www.heylovedesigns.com


DIY Wall Art Projects You Should Actually Try

Here a few things I know about wall art: it is cool, it has the power to be the center piece of any room, and it is expensive.

With that being said, I have compiled a list of unique yet simple DIY wall art projects anyone with a couple hours and the determination should try in order to save a few bucks!

DIY Wall Art Projects You Should Actually Try 

Natural-looking wood and maps are both very much in.  Check out this simple piece that is both simple yet timeless!

http://brightlybeautifulblog.blogspot.com/2014/02/diy-world-map-wall-art.html

There is something extremely therapeutic about a simple paint brush and canvas.  Try this easy design to both unwind after a long week while adding a statement piece for your home!

http://www.homedit.com/canvas-wall-art/

I have been completely obsessed with metallic gold lately.  Regardless of the color scheme in the room, it seems to always find a place.  All this next project needs is a canvas, an exacto-knife, and some gold spray paint!

http://www.andieibanez.com/2015/10/gold-canvas-diy.html

Stencils and spray paint seem to be two of the best combinations when it comes to quick and easy.  Consider using fake leaves and other greenery to make your own stencil to spray paint!

http://kandiphillips.blogspot.com/2012/08/knock-off-canvas-art.html

Large canvases can be pricey.  That is why I loved the use of this old picture, simply painted over.  Check out your local thrift store or even your very own basement for a canvas you can make new again!

http://www.ishouldbemoppingthefloor.com/2015/02/diy-herringbone-canvas-art.html

If you are going to the effort of making your own wall art project, you might as well personalize it some.  I LOVE this quote canvas project.  Take your favorite Bible verse and write it out in your own handwriting.

http://www.chrislovesjulia.com/2011/08/pinterest-challenge-robert-frost-is-in.html

Happy designing!

5 Ways to Add a Pop of Color to Your Home (Without Too Much Commitment)

Sometimes I feel a pull between two very enticing, yet different things.  There are days when all I want is a home that is neutral.  Everywhere I look, give me light greys and tans, lots of white and a touch of natural wood.  Then other days, I think to myself “life is too short, add color!”  I want my home to be bright and lively.  One that exhibits a great deal of personality.

So where is the happy medium?  Well, if you’re anything like me, you are scared of committing to too much color.  And by committing, I mean vibrant wall colors, couches, furniture, etc.  Because knowing myself, the moment I bite the bullet and spend the big bucks on a colorful piece, I would wake up the next morning, ready to white-wash my home.

So this post is for those of you that are afraid to take a giant leap into a world of color, but still want your home to be a little bit lively.  Keep reading for 5 simple ways to add color to your home (without too much commitment).

  1. Flowers

I do not care what you feel you should label your ‘style’ as, flowers fit.  Adding a vase of flowers to the middle of your kitchen table is an easy way to bring both a piece of the outdoors in, as well as add a pop of color to your home.  I love doing this because a girl such as I who is afraid of interior design commitment, can count on the flowers being dead in about a week or so.  However, for those of you more committed type, a few dollars on a fake bundle will do, as well.

  1. Picture Frames

I am a picture frame freak.  It does not matter how many I already have, I will still stroll that aisle at the store.  Picture frames are a great way to add personality for two reasons: they are a way to display some of your favorite memories, and the possibilities are endless for color options.  My favorite place to look for frames is from Marshall’s or TJMaxx, being that I can easily find a colorful frame for around $7.00.

  1. Wall art

I like the option of adding colorful art to my walls because it means I can brighten them up without actually having to paint them a bold color.  I am a major fan of neutral walls, so a bright canvas easily pops in contrast.  This is also a practical way to personalize your space.  Challenge yourself to create your own piece of art, even if you wouldn’t describe yourself as “artsy.” With a little help from Pinterest, you might just be surprised at what you can do!

  1. Throw Pillows

 Let’s be real here, there is just something about throw pillows that is a lot of fun.  The variety in colors and patterns is enough to make anybody want them all.  Luckily, these are the type of thing that can easily be swapped out if some better options come along, so go ahead and purchase the colorful one!  It will liven up your home with little effort from you.

  1. Small Furniture

 I know I stated earlier that purchasing colored furniture is often far too scary for me, but I have learned that if it is small, it can be vibrant.  Consider a small end table.  In the grand scheme of your living room, it does not take up much room.  However, by choosing one that is colorful, how much more lively your room could be!  This also presents another great DIY opportunity.  Go ahead, purchase that side table from Goodwill, and paint it something fun.  If you don’t like it, just paint it again!

All of these ideas are low in commitment level, but high in impact.  Adding color to your home should not be something that is stressful.  There is something special about making a colorful decision.  We want our homes to be a place that make us feel alive, and if color does that for you, incorporate it wherever you can!  The good news is, all of these suggestions can be easily swapped out for a different color.  Be careful, you might just become obsessed with changing your accent colors.

Don’t be afraid to be bright, and happy designing!


Photo Credit: http://www.flickr.com/photos/cariberry

The Top 4 Characteristics of a Good Thrift Store Find

Thrifting is something that always seems to be a good idea in theory.  But once we end up at our local Goodwill, it can become a lot more difficult to find a diamond in the rough.  Sometimes it can seem like everyone around us is having the greatest luck when it comes to used furniture finds or décor pieces.

Recently, I personally have fallen in love with the art of thrifting.  I have compiled a list of the top four characteristics of a good thrift store find, to help you have confidence in the treasures you may encounter.

  1. Look beyond the color.


There are some pretty heinous colors out there.  It certainly can be a struggle to look past the ugly wood stain a dresser may have, but this can be one of the best ways to save you a few bucks.  It is important to think beyond what others may see.  For the average person strolling the aisles, they see an ugly piece of furniture that should never see the light of day again (okay, slightly dramatic but you know the pieces I mean).  However, what you may see is simply a fresh coat of paint to save your new friend.

  1. Quality will always be key.


Okay, so now you notice that if you look beyond the color, there might just be hope!  However, just because you can make something look pretty does not mean that it will last.  Check thoroughly for any unrepairable scratches or cracks that could mean trouble.  I personally always apply a little pressure to the top of a table or dresser to make sure it will not tip over with the simple weight of a lamp.

  1. Money money money money… money!!!

Obviously, one of the greatest perks to the thrift store are the affordable prices.  However, that does not necessarily mean that everything is worth the money.  If you go into the store intending to makeover a piece of furniture, the simple cost of the piece is not all you will pay.  Be sure to calculate the cost of supplies, and more importantly the time that will need to go into your project to make it pretty again.  Sometimes, you might just find that the price is not low enough to go to the trouble.  Also, don’t be afraid to bargain.  In some cases, they might just be hoping to get rid of it as soon as possible, which will give you a chance to save a few pennies.

  1. You don’t always need a game plan.

If you are anything like me, DIY projects don’t just come to me the moment I find a treasure that may have potential.  Most of the time, it takes Pinterest and brainstorming to truly see a vision for some items.  However, if the price is right and you have confidence that you will find a home for your item, purchase it anyway.  Sometimes it can be fun to take on a mini-project on a rainy afternoon.

Thrifting isn’t hard, but it does take patience.  I cannot tell you how many times I have wandered the aisles of Goodwill, wanting desperately for something to catch my eye, yet walking out empty-handed.  But do not lose heart!  Your newest treasure might just be around the corner.

Happy designing!

Photo credit: http://www.blog.wickerparadise.com

To Hack or Not to Hack?

IKEA can be both a blessing and a curse.

IKEA blesses us because it is affordable (duh).  The fact that we are able to walk into the store and immediately pick up any piece of furniture is convenient for anyone looking to furnish his or her home.

IKEA curses us because while we are tempted to go for the affordable option, we may find ourselves settling for something that is obnoxiously recognizable as “IKEA.”  And who wants to buy furniture that anybody can recognize as that cheap furniture warehouse from up the street?

So my question is this: Are IKEA hacks worth it?

Let’s look at this RAST makeover, for example.

http://www.businessinsider.com/how-to-turn-an-ikea-dresser-into-a-high-end-nightstand-2016-8?amp

The RAST is a small chest of drawers, that would be most appropriate as a bedside table.  It is currently being sold online for around $35.  Because of it’s very stripped-down, original wood nature, it is often the center of many DIY-ers’ attention.

This DIY though… it’s really cute, right?  And the dresser looks nothing like IKEA, which a girl like me loves.

So was this effort worth it?

I say… YES YES YES!

IKEA provides the option for lazy DIY-ers like myself to cut a few corners.  For example, the RAST comes with already stripped-down wood (which means no sanding).  I do not yet own a sander, and I would love to go the rest of my DIY-ing life without one (but let’s be real here, I will fall in love with a certain laminate dresser from Craigslist and have no but to purchase one).  Anyway, back to the dresser.  This type of wood makes painting or staining this dresser a gazillion times easier.

Another pro to IKEA hacking is the fact that you can buy multiples of one thing.  For me, I would buy two RAST dressers, and hack them to match for either side of the bed.  When it comes to scouring all the thrift shops in town looking for nightstands, I have often found only one.  No matter how much I love that one table, his mate is still somewhere out there in the world, instead of with me.  So instead with a little hacking, I can buy two of the same, to create a miniature bedroom set for myself.

I cannot tell you guys how many times I have looked at a “start-from-scratch” Pinterest DIY and thought “Yeah, sure I’ll pin it but yeah, right I’ll do it.”  IKEA furniture gives you a skeleton for all of your projects.  Instead of attempting to build a shelving unit yourself, just buy the most basic one from IKEA and revamp it to your liking.  This way, you won’t be stuck wondering if that leaning bookshelf you attempted will collapse at any given moment, but you can instead rest easy knowing the pros at IKEA designed the blueprint/assembly.

So as I’m sure you can tell, I love to find the easiest route to doing anything, and I am a firm believer that IKEA hacks help you do just that.

Whether it be a can of spray paint, a new set of knobs, or a fresh coat of stain, IKEA presents all of us lazy-yet-still-a-little-motivated-humans the chance to still feel accomplished because we made something our own, without completely wanting to rip our hair out.

Hack away, and happy designing!


Photo credit: http://www.wayaiulandia.com